
FAQ GP Manager
I cannot start a measurement in my GpBike or GpCycle module.
The screen shows the error message as seen in Image 1a.
- The automatic search was completed unsuccessfully which is shown by the second notification in Image 1a.
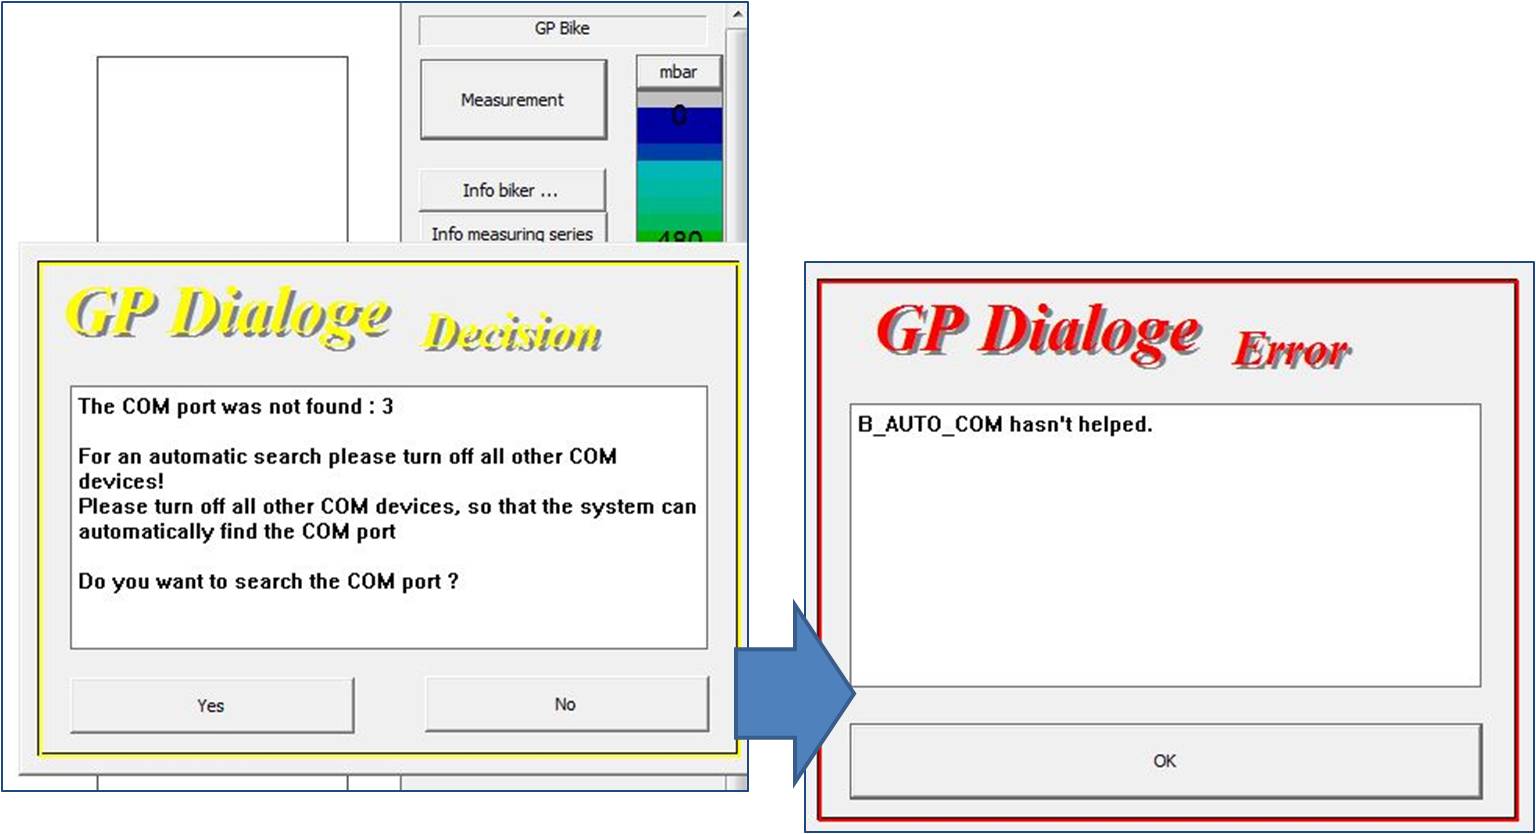
Image 1a: Bluetooth-Transmitter error notification
- The transmitter’s batteries might be empty: Please change the batteries and restart the GP Manager.
- The Bluetooth transmitter is not paired correctly with you computer: Please open the overview of the Bluetooth devices coupled with you computer by right clicking on the Bluetooth-symbol in the Windows taskbar and selecting “display Bluetooth network devices”. Remove the transmitter (“MODA *****”) by right click and selecting “remove device”. After that, search for other devices by selecting “add device”. The Bluetooth transmitter should be displayed and you can pair it with the PIN “0000”. After coupling was successful please re-start the GP Manager.
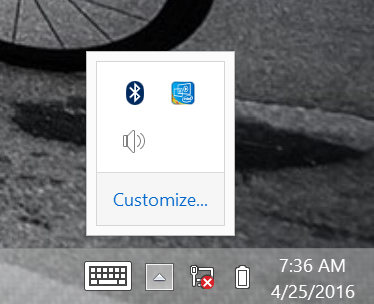
Image 1b: Bluetooth-menu in Windows taskbar
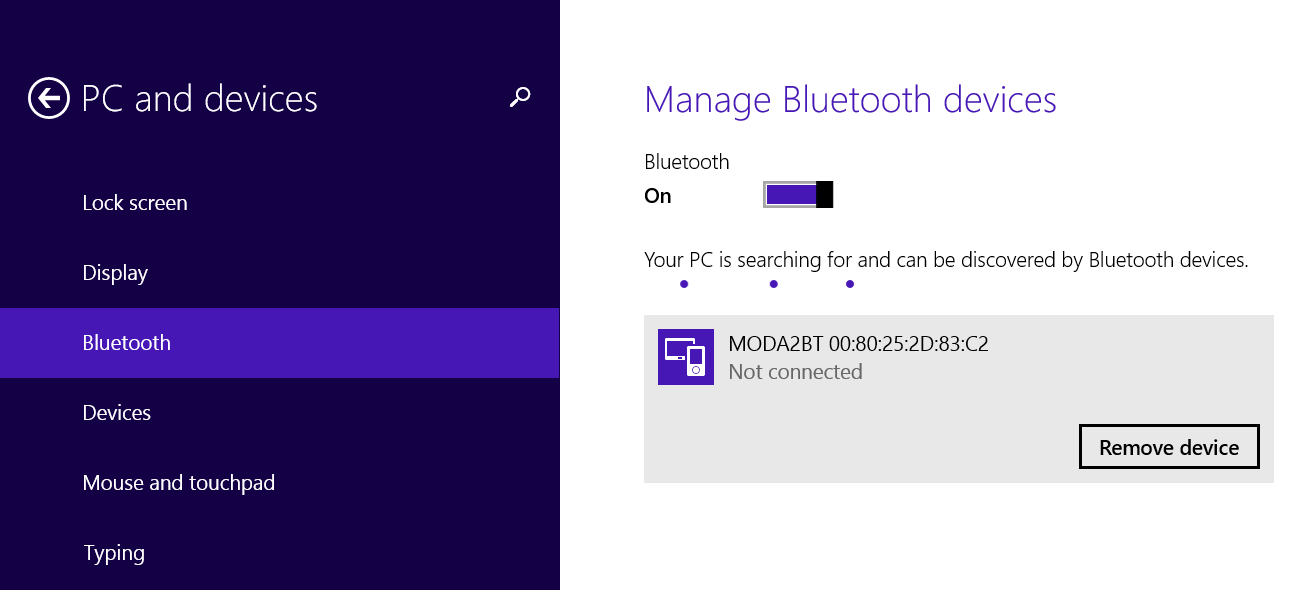
Image 1c: overview Bluetooth devices

Image 1d: overview Bluetooth devices
There is no sensor map layout shown in the live measurement dialog.
In this case, the latest version of the sensor mat calibration file is not existent on your computer
- Please copy the provided calibration file (latest version) into the folder following the path: “(…)/GeBiom_SQL/GpSystem/KAL” inside the installation folder of Gp-Manager software.
- If you cannot find the latest calibration file or if you did not receive it yet, please contact our support-team.
I cannot create a new client. / I cannot select any function of the Gp-Manager.
When creating a new customer account all fields signed with a “*” have to be filled with the customer’s data. The field “Day of birth” has to be filled in the correct formatting “dd.mm.yyyy”. You can see an example for the correct formatting in Image 2.
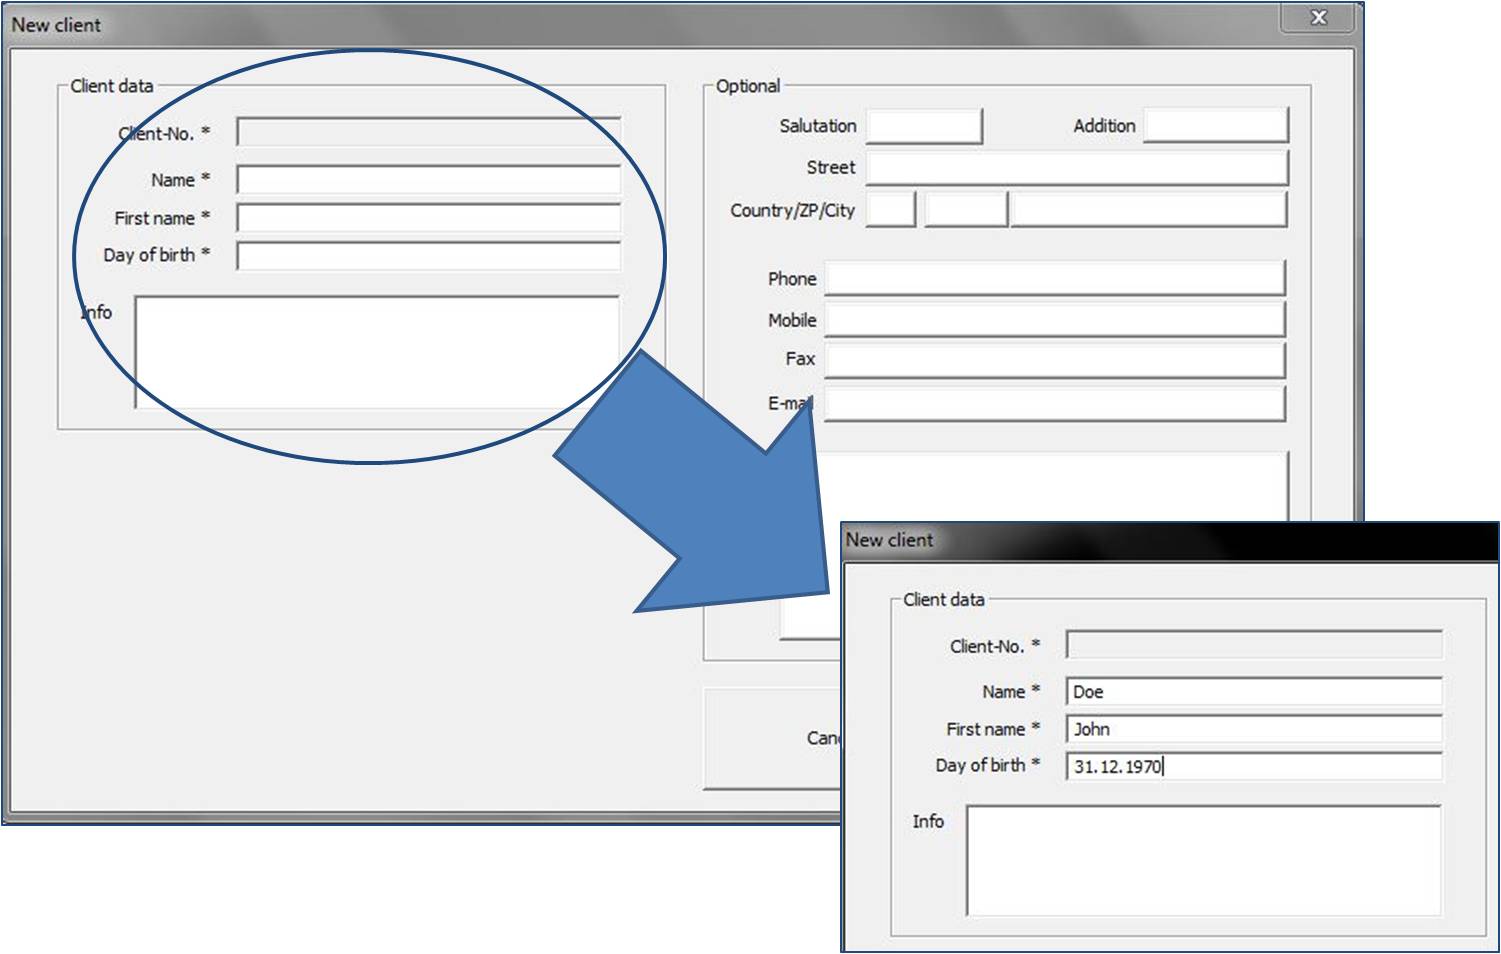
Image 2: Creating a new customer account
How do i compare two pressure measurements?
To compare two measurements you have to select the first measurement by a simple click, then press and hold the Ctrl-key and select the measurement you want to compare by double-clicking.
My company logo is not shown or shown distortedly in the home menu.
To show you company logo in the home menu of the GP-Manager the file containing the logo hast di be copied to the installation folder of the GP-Manager following this path: “(…)/GeBioM_SQL/GpSystem/BMP”
- he file has to be named “GEBIOM11”
- the file has to be formatted as “.bmp”
- to prevent the logo from being displayed distortedly the image should have an aspect ratio from ca. 3:1 and have at least 600:200 pixels
There is no live-view of the cameras in the BikeView module.
One of the error reports shown is being displayed
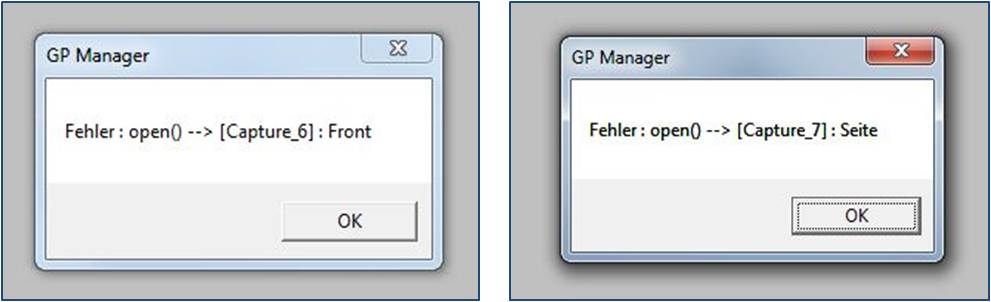
Image 3: error messages related to camera problems
Open the IDS Camera Manager and check the values wich are listed for “Cam.ID” and “Dev.ID”. These values have to be the same for each camera. If they are different like it is shown in Image 4, select one of the cameras and change the values for its “Cam.ID” to the same value as its “Dev.ID”. Therefore click on the button “Camera information” and change the value in the opening window.
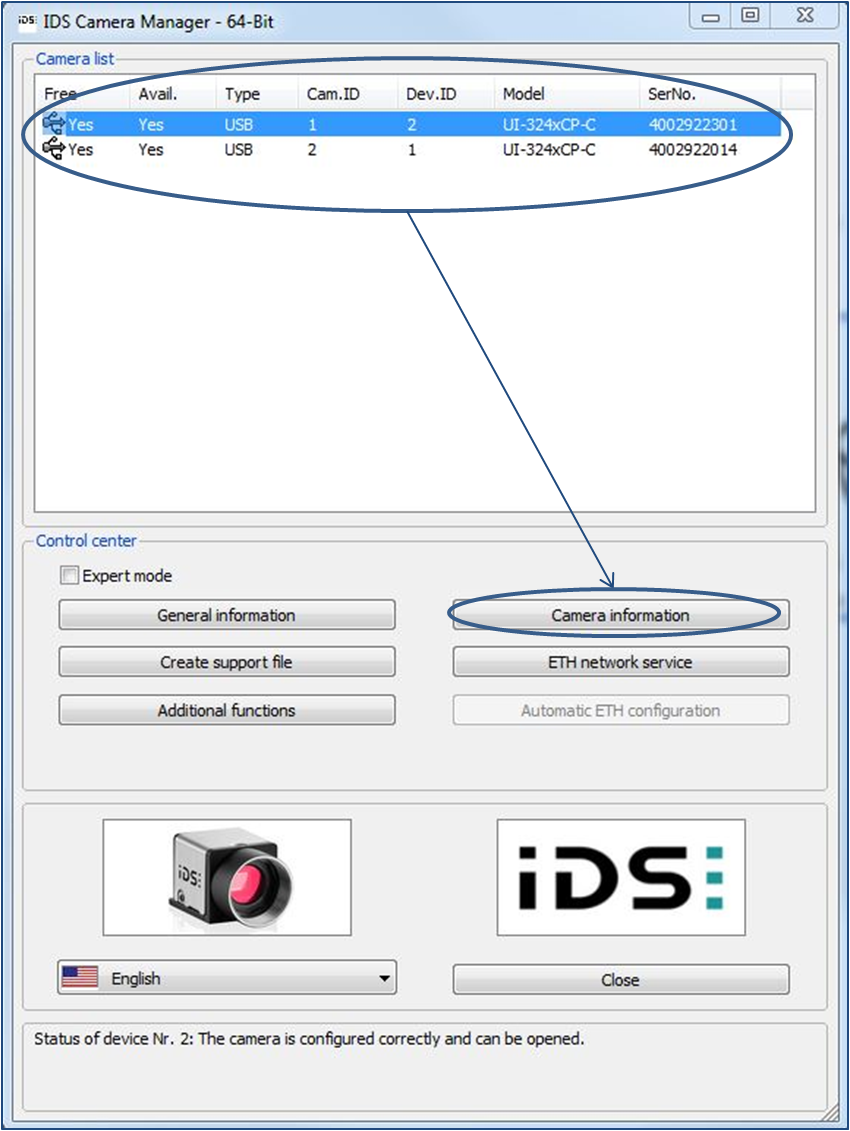
Image 4: IDS Camera Manager window
My OS was recently updated to Windows 10. Since the update I cannot get a connection to my Bluetooth transmitter.
The GP-Manager can also be used with Windows 10, but the first update from an older Windows version to Windows 10 does not install the newest version of Windows 10. According to Microsoft you can downgrade your system with this version only, with any newer versions there will be no downgrading back to old windows versions.
There are reports that this Windows version causes troubles with some drivers for Bluetooth devices. To check your version number you have to press the Windows key and the “R”-Key at the same time and type “winver” into the opening text field. If your version number is lower than 1511 there might be problems with the Bluetooth connectivity. Microsoft blocks upgrades to more current version for a period of 31 days.
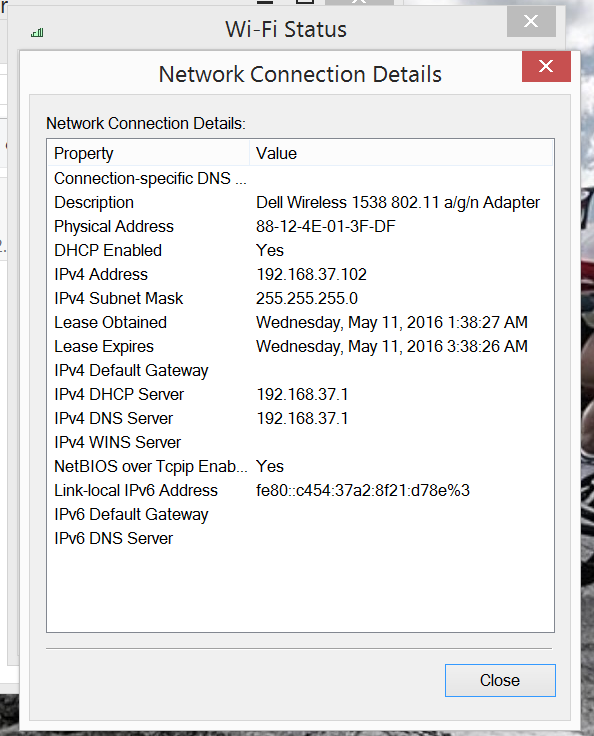
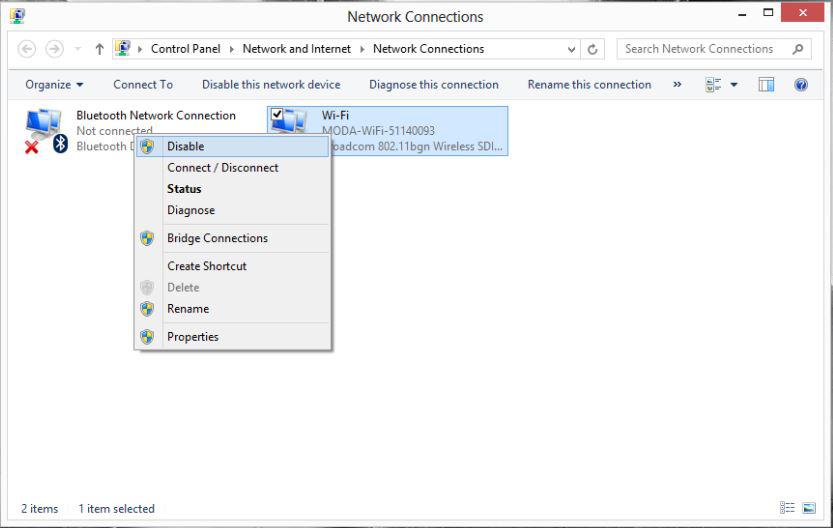
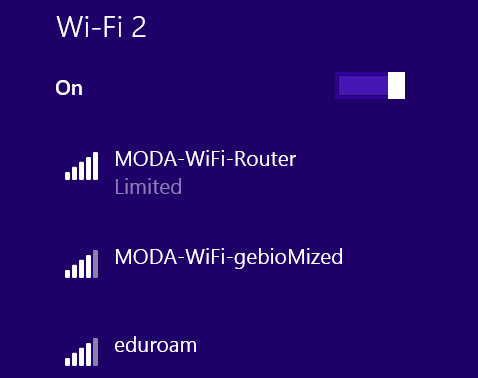
I cannot connect my computer to the WiFi transmitter
- Press Windows-button + R in order to go into the command window and type in “ncpa.cpl”
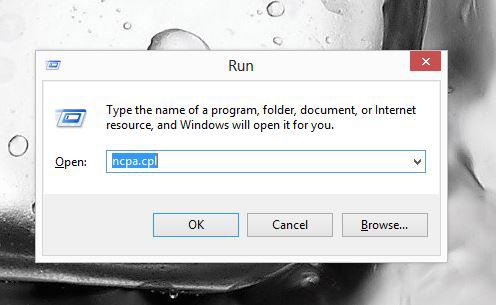
- Right-mouse click the Wi-Fi connection and select “Status”

- Select “Details…”
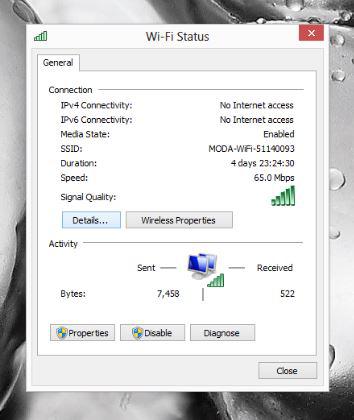
- Check whether IPv4 DHCP Server is set to 192.168.37.1 (desired status). Otherwise follow the next step.
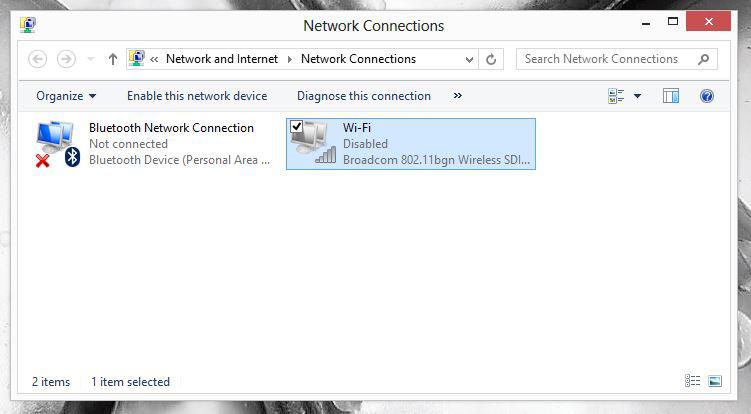
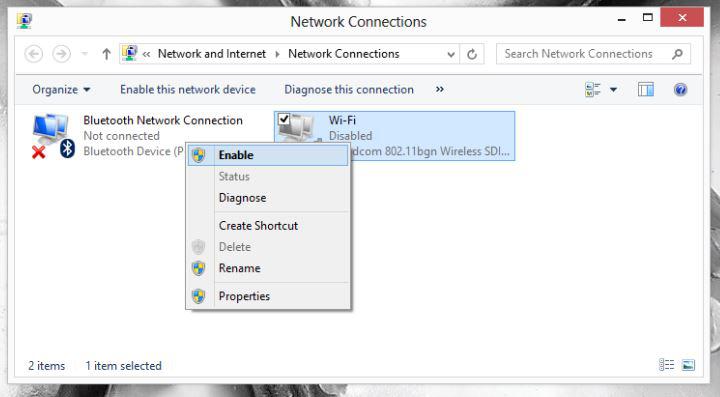
- Disable the Wi-Fi adapter
- Re-activate it by pressing “Enable”
After using the GP Manager I cannot connect to the internet. What’s wrong?
It could be the case that you used your internal WiFi adapter to connect with the TP-Link router and not the USB WiFi adapter.
- You can check this by pressing Windows-button + R in order to go into the command window and type in “ncpa.cpl”
- Make sure that your second WiFi adapter (in this case: Realtek RTL8192CU Wireless LAN..) is the one connected to the “MODA-WiFi-Router” and you do not use the internal WiFi (Dell Wireless…).

Support Form
Please give us some details on your support request in this form.
Thanks for your help – we’ll get in contact with you via mail as soon as possible.